Uploading rendered Projects into iconik
When you are done with your edits and want to upload the rendered Project back into iconik you do this via a share destination within Final Cut Pro. This will open the iconik Agent once the render is complete and you will be able to finish the upload into iconik from there. To upload a rendered Project perform the following steps:
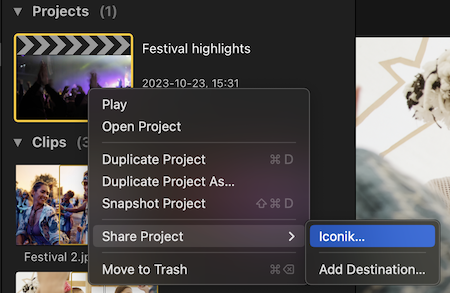
- Select and right click your Project in Final Cut Pro.
- Select iconik under the Share Project menu.
- The Project will now render and once complete be added to the upload queue in the iconik Agent.
You can now set a destination storage and collection for the upload as well as add metadata for the upload. Please refer to the section on Uploading in the iconik Agent help pages for more details on how to configure the upload.
Versioning multiple renders of the same Project
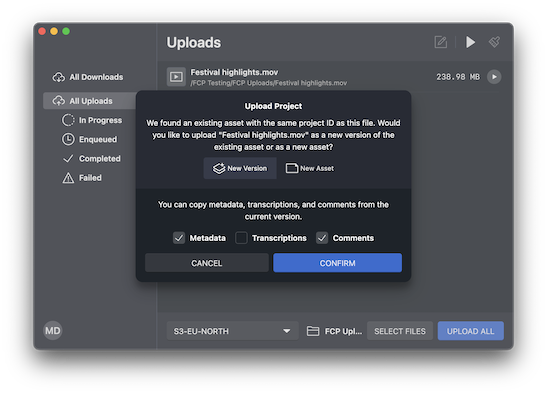
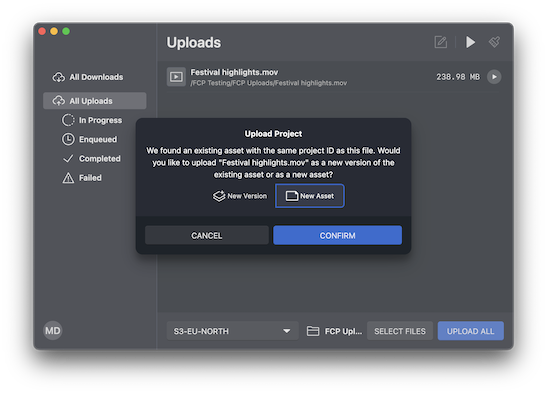
On the initial render of a Project it will always upload as a new asset. Iconik will however keep track of which Project an asset came from and when uploading that Project multiple times you will be asked if you would like to upload the new render as a new asset or as a new version of the existing asset tied to the Project. When uploading as a new version you will have the option to copy over any existing metadata, comments or transcriptions from the previous version. When uploading as a new version it is not possible to select target collection for the upload.